리눅스 / 하드디스크 파디션 만들기, 포맷하기, 마운트하기
리눅스에서 하드디스크 파티션 만들고, 포맷 하고, 마운트 하는 방법을 요약한다.
장착된 하드디스크 확인하기
- ls 명령어로 컴퓨터에 장착된 하드디스크 정보를 출력할 수 있다.
- /dev/sda, /dev/sdb 등이 하드디스크, /dev/sda1 등이 파티션이다.
# ls -l /dev/sd*
brw-rw----. 1 root disk 8,  0 Oct 16 13:12 /dev/sda
brw-rw----. 1 root disk 8,  1 Oct 16 13:12 /dev/sda1
brw-rw----. 1 root disk 8,  2 Oct 16 13:12 /dev/sda2
brw-rw----. 1 root disk 8, 16 Oct 16 13:12 /dev/sdb
brw-rw----. 1 root disk 8, 32 Oct 16 13:12 /dev/sdc
- 파일시스템은 df -T 또는 blkid /dev/sd*로 확인할 수 있다. 마운트하지 않는 파티션에 대한 정보까지 알고 싶다면 후자를 사용한다.
파티션 만들기
- 파티션을 관리하는 명령어는 fdisk이다.
- /dev/sdb의 파티션을 관리하고 싶다면 다음과 같이 명령한다.
# fdisk /dev/sdb
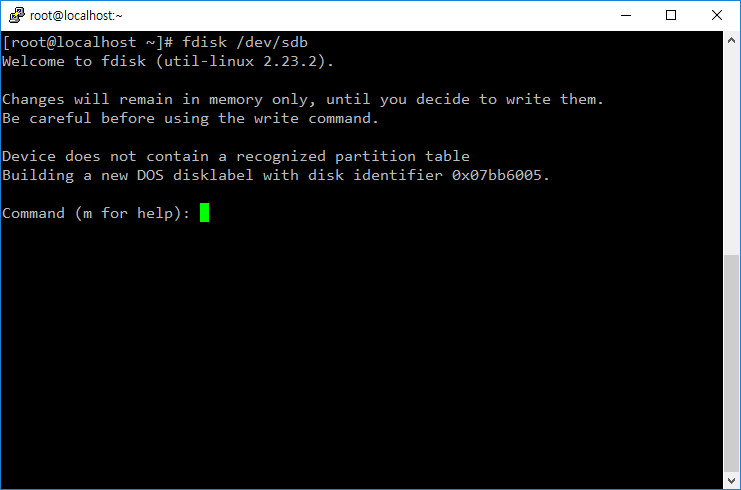
- 도움말이 필요하면 m을 입력한다.
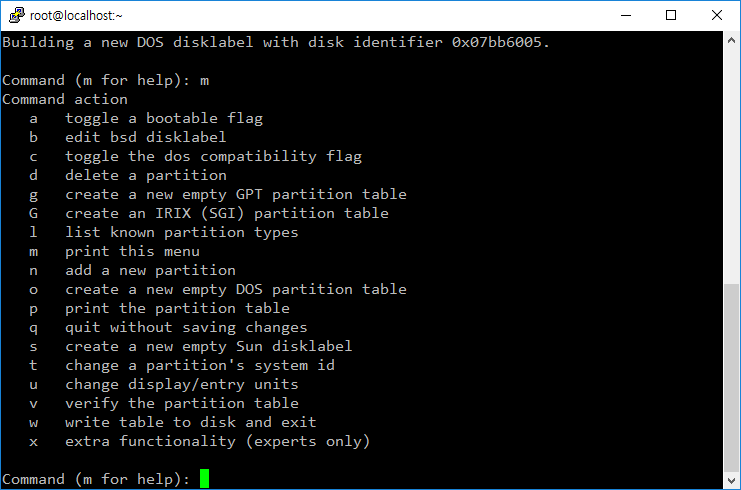
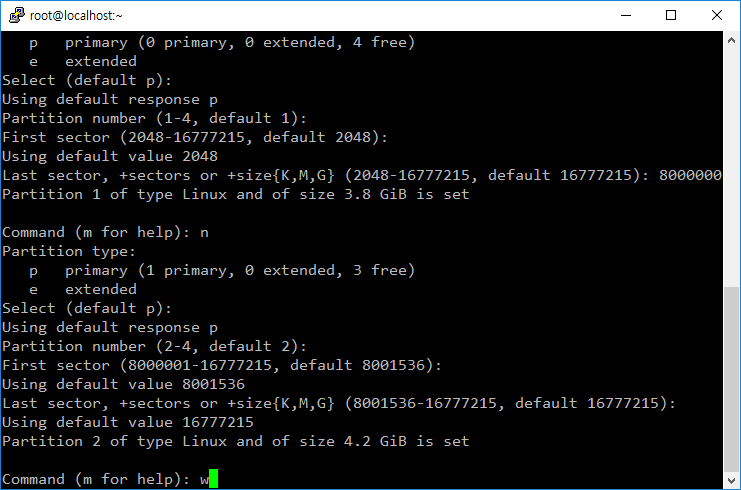
- 새 파티션은 n을 입력하고 안내에 따라 만든다.

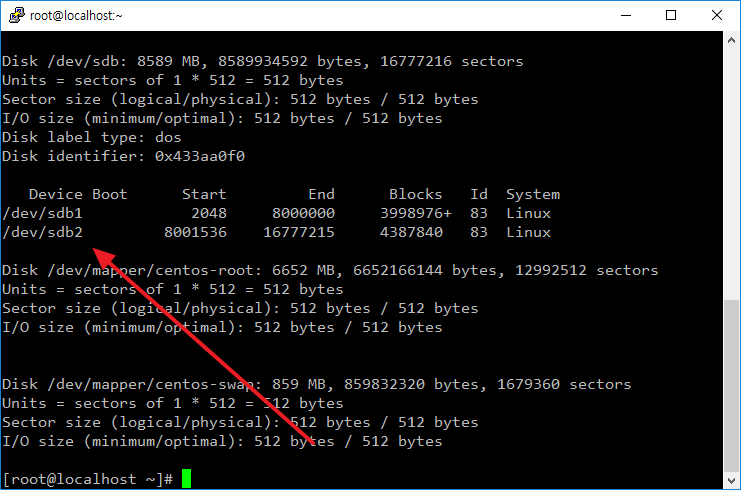
- w를 입력해야 변경사항이 반영된다.
2TB 초과 하드디스크 파티션 만들기
2TB를 초과하는, 예를 들어 4TB 하드디스크를 장착하고 파티션을 만들려고 하면 다음과 같은 메시지를 보게 되고, 전체 디스크를 사용할 수 없다.
The size of this disk is 4 TiB (4398046511104 bytes). DOS partition table format cannot be used on drives for volumes larger than 2199023255040 bytes for 512-byte sectors. Use GUID partition table format (GPT).
이런 경우 g를 입력하여 GPT partition table을 만든 후 파티션을 만든다.
Command (m for help): g
Created a new GPT disklabel (GUID: F13C6D0D-1E30-4448-B015-A61F3AE9EA48).
포맷하기
- 포맷하는 명령어는 mkfs이다.
- 예를 들어 /dev/sdb1 파티션을 ext4 파일 시스템으로 포맷하려면 다음과 같이 명령한다.
# mkfs.ext4 /dev/sdb1
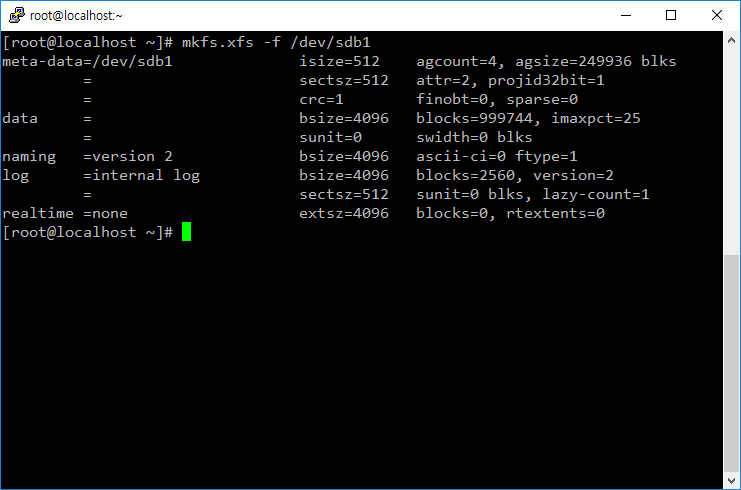
- 예를 들어 /dev/sdb1 파티션을 xfs 파일 시스템으로 포맷하려면 다음과 같이 명령한다.
# mkfs.xfs -f /dev/sdb1
- NTFS 파일 시스템으로 포맷하고 싶다면 mkntfs 명령어를 사용한다.
# mkntfs -f /dev/sdb1
- 파일 시스템은 df -T 또는 blkid /dev/sd*로 확인할 수 있다. 마운트하지 않는 파티션에 대한 정보까지 알고 싶다면 후자를 사용한다.
마운트하기
- 파티션을 특정 디렉토리에 연결해야 그 파티션을 사용할 수 있다.
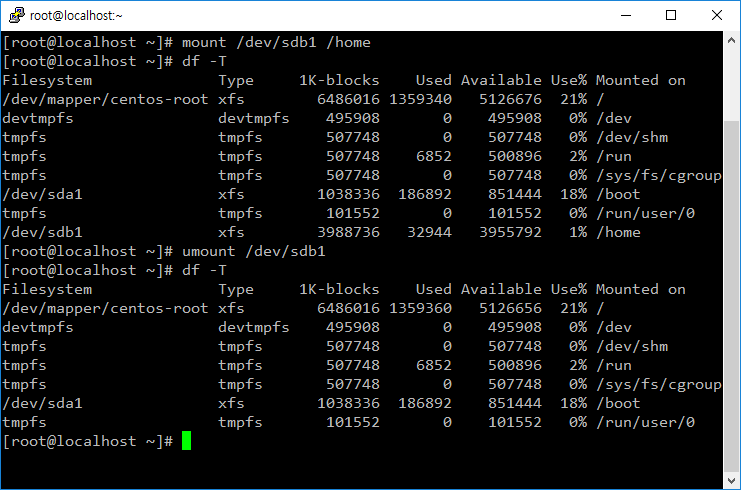
- 예를 들어 /dev/sdb1을 /home 디렉토리에 마운트하려면 다음과 같이 명령한다.
# mount /dev/sdb1 /home
- 마운트를 해제할 때는 umount 명령어를 사용한다.
# umount /dev/sdb1
- 부팅 시 자동으로 마운트되도록 하려면 /etc/fstab 파일에 다음과 같은 코드를 추가한다. /dev/sdb1 파티션을 /home 폴더에 마운트하라는 뜻이다. 파일 시스템 등 옵션은 적절히 변경한다.
/dev/sdb1 /home xfs defaults 0 0
- fstab 파일의 변경 내용을 바로 적용하고 싶다면 다음과 같이 명령한다.
# mount -a
UUID 사용하기
- 하드디스크에 /dev/sdb 같은 이름이 붙고, 파티션에는 /dev/sdb1 같은 이름이 붙는데, 이 이름이 고정된 것은 아니다. 하드디스크 장착 위치를 바꾸거나, 인식 순서가 바뀌면 그 이름도 바뀐다. 그런 경우 마운트가 제대로 되지 않을 수 있다. 그래서 마운트를 할 때는 하드디스크 고유값인 UUID를 사용하는 것이 좋다.
- UUID는 blkid 명령으로 확인할 수 있다.
# blkid
/dev/sda1: UUID="69d9add5-2153-4bc2-ad99-1560fb205c4b" TYPE="ext4" PARTUUID="aa61ba4b-01"
/dev/sda2: UUID="PuMuNg-5YHg-qikJ-tc10-iPIM-7W1q-4fUqyc" TYPE="LVM2_member" PARTUUID="aa61ba4b-02"
/dev/mapper/cl-root: UUID="79c8cfcb-c9e2-4243-8cf2-cf10eab57c40" TYPE="xfs"
/dev/mapper/cl-swap: UUID="b69a5fc3-98db-4a27-b3d4-a7ef76244ad1" TYPE="swap"
/dev/mapper/cl-home: UUID="fd372a6b-ee76-41d6-b7e6-6e6a7cf8193b" TYPE="xfs"
/dev/sdb1: UUID="fd95c93f-03fc-418a-a6db-c26b921ec93b" TYPE="xfs" PARTUUID="e5f55ef6-01"
- /etc/fstab에 마운트 정보를 넣을 때
/dev/sdb1 /home xfs defaults 0 0
- 대신 다음처럼 한다.
UUID=fd95c93f-03fc-418a-a6db-c26b921ec93b /home xfs defaults 0 0
리눅스에서 네트워크 정보는 주로 ifconfig, ip addr 명령어로 확인한다. 그런데, gateway 정보는 나오지 않는다. 만약 gateway 정보가 필요하다면 route 명령어를 사용한다. Ubuntu애서 명령어가 없다고 나오면 net-tools를 설치한다. apt install net-tools
다른 서버의 특정 포트가 열려 있는지 알아야 할 때가 있습니다. 윈도우와 리눅스에서 확인하는 방법을 정리합니다. 윈도우 telnet 명령어 이용하는 방법 텔넷 클라이언트 기능을 추가합니다. 명령 프롬프트(CMD) 또는 PowerShell에서 다음과 같이 명령합니다. google.com의 443 포트가 열렸는지 확인하는 것입니다. C:\Users\JB>telnet google.com 443 포트가 열려 있다면 아무 내용 없는 창이 나옵니다. 만약 닫혀 있다면 아래와 같이 연결하지 못한다는 메시지가 나옵니다. C:\Users\JB>telnet ...

상태 확인 켜진 상태라면 Enforcing, 꺼진 상태라면 Permissive를 출력한다. getenforce 방법 1 다음과 같이 명령하면 SELinux가 꺼진다. 재부팅하면 다시 SELinux가 켜진다. setenforce 0 만약 다시 SELinux를 사용하고 싶다면 다음과 같이 명령한다. setenforce 1 방법 2 /etc/selinux/config에 다음과 같은 코드가 있다. SELINUX=enforcing 다음과 같이 바꾼다. SELINUX=disabled 시스템을 재부팅하면 적용된다. 방법 1과는 달리 재부팅해도 설정이 유지된다.
리눅스 / 명령어 / ls / 디렉토리와 파일 목록 출력하는 명령어
ls는 list의 약어로, 디렉토리와 파일 목록을 출력하는 명령어이다. ls 디렉토리명 디렉토리에 속한 디렉토리와 파일 목록을 출력한다. 숨김 파일은 나오지 않는다. 디렉토리명을 생략하면 현재 디렉토리에 속한 디렉토리와 파일 목록을 출력한다. 예를 들어 다음과 같이 명령하면 /var 디렉토리에 속한 디렉토리와 파일 목록을 출력한다. # ls /var ls -a, ls -l -a 옵션을 붙이면 숨김 파일도 출력한다. -l 옵션을 붙이면 소유자, 파일 ...
Rocky Linux 8 / root 계정으로 ssh 접속 가능하게 설정하는 방법
Rocky Linux를 설치할 때 가능하게 설정하지 않았다면, root 계정으로 ssh 접속을 할 수 없다. 보안 상 권장되는 설정이나, 테스트나 공부 목적 등으로 root 계정으로 ssh 접속하는 게 더 좋은 상황이라면, 다음과 같이 하여 접속을 허용할 수 있다. vi나 nano 같은 텍스트 에디터로 /etc/ssh/sshd_config 파일을 연다. 제일 밑에 다음 코드를 추가하고, 저장한다. PermitRootLogin yes 다음과 같이 ...
리눅스 / 배포판 / 수세 리눅스(SUSE Linux) - 역사, 특징, 장점
수세 리눅스의 역사 수세 리눅스(SUSE Linux)는 독일의 뉘른베르크에 본사를 두고 있는 SUSE 회사에 의해 개발된 리눅스 배포판입니다. SUSE는 "Software- und System-Entwicklung"의 약자로, "소프트웨어 및 시스템 개발"을 의미합니다. 초기 역사 SUSE 리눅스는 1992년에 설립되어, 처음에는 Slackware를 기반으로 한 리눅스 배포판을 제공했습니다. SUSE는 독일어권 지역을 중심으로 인기를 끌었으며, 이후 독자적인 리눅스 배포판을 개발하게 되었습니다. 노벨(Novell) 인수 2003년 ...
Ubuntu 22.04 Server / ZIP 압축 파일 푸는 방법
ZIP 파일을 압축 해제하기 위해서는 unzip 패키지가 필요하다. # apt install unzip xxx.zip 파일을 압축 해제하려면 다음과 같이 명령한다. # unzip xxx.zip 다음과 같이 명령하여 도움말을 볼 수 있다. # unzip -h 결과는 다음과 같다. UnZip 6.00 of 20 April 2009, by Debian. Original by Info-ZIP. Usage: unzip Default ...
파일 이름 바꾸기 mv는 파일을 이동시키는 명령어이다. 이 명령어를 이용해서 파일 이름을 바꿀 수 있다. 예를 들어 다음은 abc.txt를 xyz.txt로 바꾼다. # mv abc.txt xyz.txt 디렉토리 이름 바꾸기 디렉토리 이름을 바꾸는 것도 파일 이름 변경과 같다. 다음은 abc 디렉토리의 이름을 xyz로 바꾼다. # mv abc xyz
리눅스 / 명령어 / touch / 빈 파일 만들기, 최종 수정 시간 변경하기
touch는 빈 파일 만들거나 파일의 최종 수정 시간을 현재 시간으로 바꾸는 명령어이다. abc.txt 파일이 없다면, 내용이 없는 abc.txt 파일을 만듭니다. abc.txt 파일이 있다면, 파일의 최종 수정 시간을 현재로 변경합니다. # touch abc.txt
Ubuntu 20.04 Server / Samba / 설치하고 공유 폴더 만드는 방법
Samba를 이용하여 Ubuntu Server에 공유 폴더를 만들고, Windows 클라이언트에서 접속하는 방법을 알아본다. Samba 설치 Samba를 설치한다. 설치하면 바로 시작하고, 재부팅을 해도 자동으로 시작한다. apt install samba 공유할 폴더를 만들고 권한을 777로 설정한다. mkdir /sharedfolder chmod 777 /sharedfolder 설정 파일은 /etc/samba/smb.conf이다. 텍스트 에디터로 열고 제일 밑에 다음 코드를 추가한다. 폴더 이름은 sharedfolder이지만, 네트워크에서는 Shared Folder로 보인다. comment = ...