Ubuntu 18.04 Server / Nginx, PHP, MariaDB 설치하고 설정하기
Nginx
설치
Nginx를 설치합니다.
# apt install nginx
만약 방화벽을 사용하고 있다면 포트를 열어줍니다.
# ufw allow 'Nginx Full'
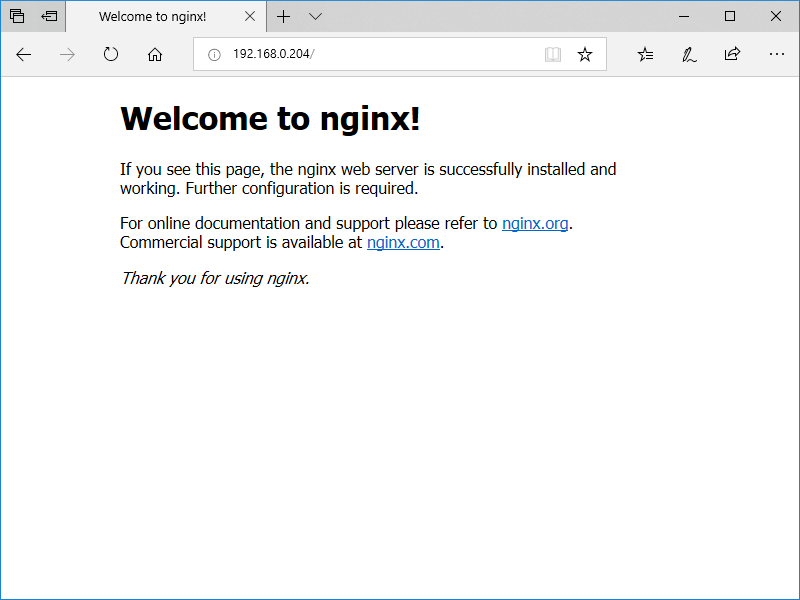
서버 주소로 접속했을 때 다음과 같이 나오면 제대로 된 것입니다.
시작, 정지 등
Nginx를 시작합니다.
# systemctl start nginx
Nginx를 멈춥니다.
# systemctl stop nginx
Nginx를 재시작합니다.
# systemctl restart nginx
Nginx를 다시 로드합니다.
# systemctl reload nginx
Nginx를 설치하면 부팅 시 자동으로 시작하게 설정됩니다. 만약 자동 시작을 해제하고 싶다면 다음과 같이 명령합니다.
# systemctl disable nginx
자동 시작하도록 하려면 다음과 같이 명령합니다.
# systemctl enable nginx
PHP
설치
php-fpm을 설치합니다.
# apt install php-fpm
설정
/etc/nginx/sites-available/default 파일을 열고 다음 코드를 찾습니다.
#location ~ \.php$ {
#	include snippets/fastcgi-php.conf;
#
#	# With php-fpm (or other unix sockets):
#	fastcgi_pass unix:/var/run/php/php7.0-fpm.sock;
#	# With php-cgi (or other tcp sockets):
#	fastcgi_pass 127.0.0.1:9000;
#}
다음처럼 바꿉니다.
location ~ \.php$ {
  include snippets/fastcgi-php.conf;
#
#	# With php-fpm (or other unix sockets):
  fastcgi_pass unix:/var/run/php/php7.0-fpm.sock;
#	# With php-cgi (or other tcp sockets):
#	fastcgi_pass 127.0.0.1:9000;
}
index.php를 자동 인식하게 하려면
index index.html index.htm index.nginx-debian.html;
에 index.php를 추가합니다.
index index.html index.htm index.nginx-debian.html index.php;
Nginx를 다시 로드 해야 적용됩니다.
# service nginx reload
테스트
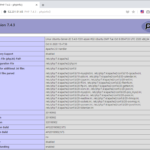
/var/www/html/ 디렉토리에 phpinfo.php를 만들고 다음 코드를 입력하고 저장합니다.
<?php phpinfo(); ?>
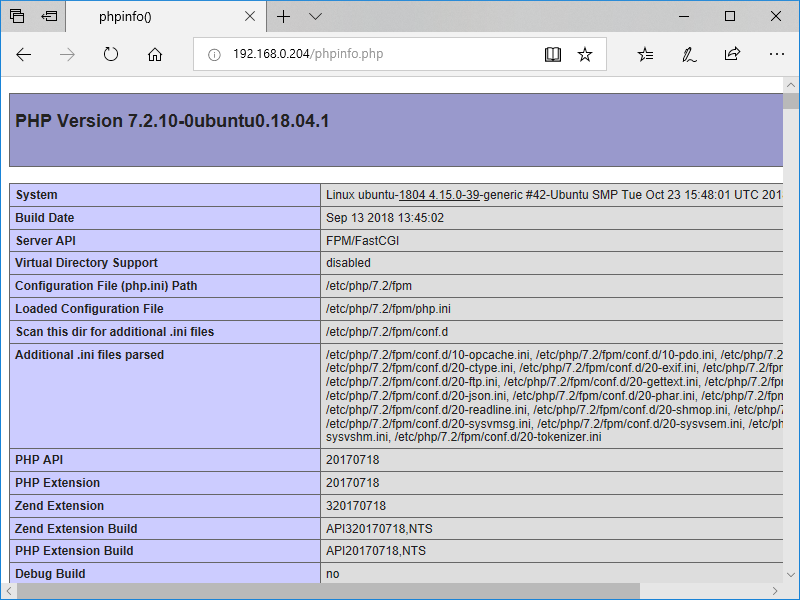
웹브라우저로 server-ip/phpinfo.php로 접속했을 때 다음과 같이 나오면 제대로 된 것입니다.
MariaDB
설치
MariaDB와 php-mysql을 설치합니다.
# apt install mariadb-server php-mysql
설정
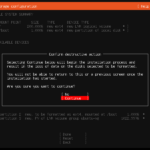
다음과 같이 명령하여 root 계정 비밀번호 등 몇 가지를 설정합니다.
# mysql_secure_installation
웹에서 root 계정 사용
웹에서 root 계정을 사용할 수 있게 하려면 수정해야 합니다. MariaDB에 접속합니다.
# mysql -uroot -p
다음을 차례대로 입력합니다.
use mysql;
update user set plugin='' where user='root';
flush privileges;
quit;
Ubuntu 20.04 Server / hostname 확인하는 방법, 변경하는 방법
hostname 확인하는 방법 방법 1 - 명령어로 확인하기 다음과 같이 명령하면 hostname을 출력한다. hostname 방법 2 - 설정 파일 열어서 확인하기 /etc/hostname 파일에 hostname이 있다. cat /etc/hostname hostname 변경하는 방법 방법 1 - 명령어로 변경하기 다음과 같이 명령하면 hostname이 abc로 바뀐다. hostnamectl set-hostname abc 방법 2 - 설정 파일 열어서 변경하기 텍스트 에디터로 /etc/hostname 파일을 열어서 내용을 abc로 바꾸면 hostname이 abc로 바뀐다. 재부팅 재부팅을 하면 변경사항이 ...
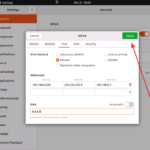
Ubuntu 24.04 Server / 고정 IP 설정하는 방법
네트워크 설정 파일은 /etc/netplan 디렉토리 안에 있는 yaml 파일입니다. 파일 이름은 시스템마다 다를 수 있습니다. # ll /etc/netplan total 12 drwxr-xr-x 2 root root 4096 Apr 27 23:00 ./ drwxr-xr-x 108 root root 4096 Apr 27 23:06 ../ -rw------- 1 root root 389 Apr 27 23:00 50-cloud-init.yaml DHCP라면 설정 파일이 다음과 ...
Ubuntu 22.04 Server / root 계정으로 로그인하는 방법, root 계정으로 ssh 접속하는 방법
Ubuntu는 설치할 때 일반 사용자 계정만 만듭니다. 관리자 권한이 필요할 때는 sudo를 이용하죠. 그런데 공부를 위해 혼자만 사용하거나, 여러 가지 이유로 보안에 문제가 없는 경우 root 계정으로 로그인해서 작업하는 게 편합니다. root 계정으로 로그인 하는 방법 일반 사용자 계정으로 로그인합니다. 다음과 같이 명령하여 root 계정의 비밀번호를 만들면 root 계정으로 로그인할 수 있습니다. # sudo ...
Ubuntu 22.04 Server / 원격 데스크톱으로 연결하는 방법
GUI 설치 우분투에 GUI를 설치한다. # apt install ubuntu-desktop-minimal xrdp 설치 xrdp를 설치한다. # apt install xrdp 방화벽 설정 원격 데스크톱은 3389 포트를 사용하므로, 방화벽을 사용하고 있다면 포트를 열어 준다. ufw allow 3389/tcp 원격 데스크톱 연결 원격 데스크톱으로 접속한다. 아래와 같은 창이 뜨는데, 를 클릭한다. 계정 정보를 입력하고 를 클릭하면... 원격지에서 GUI로 우분투를 즐길 수 있다.
다운로드 Ubuntu Server 다운로드 페이지는 다음과 같다. https://ubuntu.com/download/server 최신 버전에 대한 안내가 주로 있으므로, 구버전을 다운로드하고 싶다면 아래 링크가 편하다. https://mirror.kakao.com/ubuntu-releases/ 가상 머신에 설치한다면 다운로드한 ISO 파일을 그대로 사용하면 되고, 물리 서버에 설치한다면 Rufus 같은 툴을 이용하여 부팅 USB를 만든다. 설치 설치 미디어로 부탕하고 잠시 기다리면 언어를 선택하는 화면이 나온다. 원하는 언어를 선택하고 엔터키를 누른다. 키보드 레이아웃을 정하고 ...
다운로드 Ubuntu Server 다운로드 페이지는 다음과 같다. https://ubuntu.com/download/server 최신 버전에 대한 안내가 주로 있으므로, 구버전을 다운로드하고 싶다면 아래 링크가 편하다. https://mirror.kakao.com/ubuntu-releases/ 가상 머신에 설치한다면 다운로드한 ISO 파일을 그대로 사용하면 되고, 물리 서버에 설치한다면 Rufus 같은 툴을 이용하여 부팅 USB를 만든다. 설치 설치 미디어로 부탕하고 잠시 기다리면 언어를 선택하는 화면이 나온다. 원하는 언어를 선택하고 엔터키를 누른다. 키보드 레이아웃을 선택한다. 네트워크 ...
Ubuntu 22.04 Server / 고정 IP 설정하는 방법
설정 파일 수정하기 네트워크 설정 파일은 /etc/netplan 디렉토리 안에 있는 yaml 파일이다. DHCP로 설치했다면, 설정 파일 내용은 다음과 비슷하게 되어 있다. # This is the network config written by 'subiquity' network: ethernets: eth0: dhcp4: true version: 2 다음과 같이 수정하고 저장한다. IP 등은 네트워크 환경에 ...
Ubuntu 24.04 Server / SSH / 포트 변경하는 방법
보안 등의 이유로 SSH 포트를 변경해야 한다면, 다음과 같이 한다. /etc/ssh/sshd_config에서 다음의 코드를... #Port 22 다음으로 변경한다. Port 1980 방화벽이 활성화되어 있다면 1980 포트를 열어준다. ufw allow 1980/tcp SSH 서비스를 다시 시작한다. systemctl restart ssh SSH 서비스를 다시 시작해도 적용되지 않으면, 컴퓨터를 다시 시작한다.
우분투 16.04에 SASS를 설치하는 방법은 두 가지가 있습니다. 방법 1 apt install ruby-sass 방법 2 apt install ruby gem install sass 설치되었는지 확인하는 방법 sass -v SASS 버전이 출력되면 제대로 설치된 것입니다. Sass 3.4.23 (Selective Steve) 참고 최신 버전의 SASS를 사용하고 싶다면 방법 2로 설치합니다.
Ubuntu 22.04 Server / Apache, PHP, MariaDB 설치하는 방법
Ubuntu Server에 웹서버 Apache, 웹프로그래밍 언어 PHP, 데이터베이스 MariaDB를 설치하는 방법입니다. 웹서버 운영을 위한 최소한의 설치로, 실제로 서비스할 때는 더 많은 패키지가 필요할 수 있습니다. 설치 Apache, PHP, MariaDB를 설치합니다. php-mysql은 PHP와 MariaDB 연동을 위한 패키지입니다. # apt install apache2 mariadb-server php php-mysql MariaDB 설정 다음과 같이 명령하여 몇 가지 설정을 합니다. # mysql_secure_installation MariaDB의 root 계정 ...