다른 서버나 컴퓨터의 특정 포트로 통신 가능한지 확인하는 방법
서버를 운영하거나 네트워크 문제를 점검하다 보면 “상대 서버의 특정 포트로 접속이 되는지” 확인해야 할 때가 많습니다. 예를 들어 웹 서버의 80번, 443번 포트가 열려 있는지 확인하거나, DB 서버의 3306, 5432 포트로 접속 가능한지 확인해야 하는 경우가 있습니다. 또한 방화벽 정책을 변경한 뒤 실제로 통신이 가능한지 검증할 때도 포트 확인은 매우 중요합니다.
특정 포트로 통신이 가능한지 확인한다는 것은 단순히 상대 서버가 켜져 있는지 보는 것과 다릅니다. ping이 된다고 해서 특정 포트가 열려 있다는 뜻은 아니고, 반대로 ping이 안 된다고 해서 반드시 서비스 접속이 불가능하다는 뜻도 아닙니다. 실제 서비스 통신 가능 여부는 해당 서버의 IP 주소와 포트 번호를 기준으로 확인해야 합니다.
윈도우
telnet 명령어 이용하는 방법
- 텔넷 클라이언트 기능을 추가합니다.
- 명령 프롬프트(CMD) 또는 PowerShell에서 다음과 같이 명령합니다. google.com의 443 포트가 열렸는지 확인하는 것입니다.
C:\Users\JB>telnet google.com 443
- 포트가 열려 있다면 아무 내용 없는 창이 나옵니다.
- 만약 닫혀 있다면 아래와 같이 연결하지 못한다는 메시지가 나옵니다.
C:\Users\JB>telnet google.com 444
연결 대상 google.com...호스트에 연결할 수 없습니다. 포트 444: 연결하지 못했습니다.
tnc 명령어 이용하는 방법
- PowerShell에서 다음과 같이 명령합니다. google.com의 443 포트가 열렸는지 확인하는 것입니다.
- 열려 있다면 True...
PS C:\Users\JB> tnc google.com -port 443

ComputerName     : google.com
RemoteAddress    : 142.250.76.142
RemotePort       : 443
InterfaceAlias   : Ethernet
SourceAddress    : 192.168.0.201
TcpTestSucceeded : True
- 그렇지 않다면 False를 반환합니다.
PS C:\Users\JB> tnc google.com -port 444
경고: TCP connect to (142.250.76.142 : 444) failed

ComputerName           : google.com
RemoteAddress          : 142.250.76.142
RemotePort             : 444
InterfaceAlias         : Ethernet
SourceAddress          : 192.168.0.201
PingSucceeded          : True
PingReplyDetails (RTT) : 34 ms
TcpTestSucceeded       : False
Test-NetConnection 명령어 이용하는 방법
- PowerShell에서 다음과 같이 명령합니다. google.com의 443 포트가 열렸는지 확인하는 것입니다.
PS C:\Users\jb> Test-NetConnection -ComputerName google.com -Port 443                                                                                                                                                                                                                                                                                                   ComputerName     : google.com
RemoteAddress    : 142.250.207.110
RemotePort       : 443
InterfaceAlias   : Ethernet
SourceAddress    : 192.168.0.200
TcpTestSucceeded : True
리눅스
- nc 명령어로 확인할 수 있습니다.
# nc -zv google.com 443
Ncat: Version 7.70 ( https://nmap.org/ncat )
Ncat: Connected to 142.250.206.206:443.
Ncat: 0 bytes sent, 0 bytes received in 0.05 seconds.
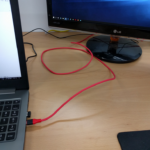
USB Type C To HDMI 연결 케이블로 노트북와 모니터 연결하기
노트북을 사용합니다. 집이나 회사에서는 모니터와 연결해서 사용합니다. 노트북과 모니터, 두 개의 화면에서 작업하는데, 어떤 작업을 할 때는 그걸로도 부족할 때가 있습니다. 그래서 모니터를 하나 더 연결하기로 했습니다. 그런데 문제가 있습니다. 노트북에 HDMI 단자가 하나만 있습니다. DP도 없습니다. 대신 USB Type C 포트가 있습니다. 검색을 해보았습니다. USB C HDMI... 잔뜩 상품이 나오더군요. ...
아이피타임(ipTIME) 공유기 / 원격으로 재부팅하는 방법
컴퓨터나 스마트폰 등 IT 기기가 제대로 작동하지 않을 때, 언제나 써먹을 수 있는 해결 방법이 재부팅입니다. 소프트웨어적인 문제인 경우 재부팅으로 해결 되는 경우가 많습니다. 인터넷 공유기도 마찬가지입니다. 인터넷에 연결이 잘 되지 않거나 속도가 느려졌다면, 재부팅을 해보세요. 바로 해결될 수도 있습니다. 인터넷 공유기가 거실 등 눈에 보이는 곳에 있다면 쉽게 재부팅할 수 있는데, ...
PhotoScape X / 윈도우에서 포토스케이프 X 설치하는 방법
사진 편집 프로그램을 찾고 있다면 PhotoScape X(포토스케이프 X)는 한 번쯤 사용해 볼 만한 무료 이미지 편집 프로그램입니다. 포토스케이프는 사진 보정, 이미지 크기 변경, 자르기, 콜라주 만들기, 이어붙이기, GIF 만들기, 워터마크 넣기 등 다양한 기능을 제공하는 프로그램으로, 초보자도 비교적 쉽게 사용할 수 있다는 장점이 있습니다. 특히 블로그를 운영하거나 쇼핑몰 상품 이미지를 정리해야 ...
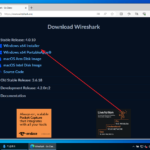
Wireshark는 패킷 분석 프로그램이다. 오픈 소스로 자유롭게 사용할 수 있다. The non-profit Wireshark Foundation supports the development of Wireshark, a free, open-source tool used by millions around the world. Wireshark is distributed under the GNU GPLv2. There are no restrictions on its use. There are restrictions on its distribution in source or ...
안드로이드 / 앱 / 카카오뱅크 / 후불교통카드 사용 내역 확인하는 방법
카카오뱅크에서 체크카드를 만들 때 후불 교통 카드 기능을 넣을 수 있습니다. 대중 교통을 이용할 때 바로 돈이 나가는 게 아니라, 한 달치를 모아서 다음 달 10일에 납부하게 됩니다. 잔고가 없어도 사용할 수 있으므로, 가능하다면 후불 교통 카드가 편합니다. 대신 교통 카드 이용 내역을 확인하는 것은 좀 번거롭습니다. 통장 거래 내역에 나오지 ...
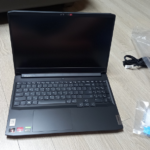
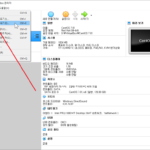
아이디어패드 게이밍 3 15ACH R5 3050Ti 구입 후기
PC도 마찬가지지만, 노트북을 구입할 때 그것으로 무엇을 할 것인지 명확히 하는 것이 좋다. 그래야 적합한 제품을 고를 수 있으니까. PC는 최소 사양으로 맞춘 후 업그레이드가 가능하지만, 노트북은 메모리 추가나 저장공간 추가 정도 밖에 할 수 없으므로 더욱 신중하게 골라야 한다. 노트북은 일단 사무용으로 사용할 것인지 게임용으로 사용할 것인지를 정해야 한다. 게임용은 ...
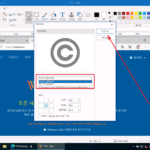
픽픽은 캡처 프로그램이지만 간단한 이미지 편집을 할 수도 있고 동영상 녹화도 가능합니다. 그리고 기타 유용한 기능들을 포함하고 있는데, 그 중 하나가 워터마크를 넣는 기능입니다.(여러 이미지에 워터마크를 넣고 싶다면 PhotoScape X를 이용하는 게 편합니다.) 워터마크를 넣고 싶은 이미지를 엽니다. 를 클릭합니다. 이미지 또는 텍스트를 선택하고 위치를 정합니다. 에 체크하면, ...
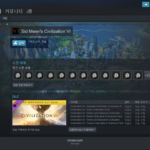
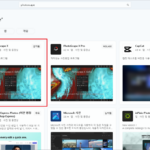
우연히 문명이라는 게임을 알게되었습니다. '문명하셨습니다'라는 유행어가 있었을 정도로 유명한 게임이라고 하네요. 게임을 시작하면 시간은 별로 안 가는데 날짜가 바뀐다는... 인터넷에 있는 온갖 글과 영상이 문명을 추천하고 있어서, 한 번 해보기로 했습니다. 문명 5와 문명 6에 대해서 호불호가 갈리는데, 전 그래도 최신판인 문명 6으로 결정했습니다. 어디서 구입을 해야 하나 알아보았더니, 스팀에 있네요. 게다가 ...
버추얼박스의 가상 머신을 백업하고 복원하는 방법 중의 하나는 내보내기와 가져오기를 이용하는 것입니다. 내가 만든 가상 머신을 남에게 전달할 때도 유용한 방법입니다. 내보내기는 가상 머신의 모든 구성 요소를 하나의 파일로 만드는 것이라 파일의 크기가 상당히 큰데, SSD라면 꽤 빠른 시간에 끝납니다. 가져오기도 마찬가지입니다. 내보내기 왼쪽 위의 을 클릭합니다. 를 클릭합니다. 단축키는 Ctrl+E입니다. 내보낼 가상 ...
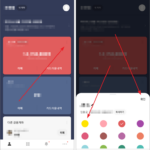
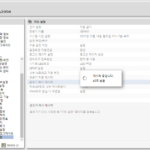
안드로이드 / 앱 / 카카오뱅크 / 계좌 색상 변경하는 방법, 이름 변경하는 방법
카카오뱅크에 계좌가 여러 개 있으면 어떤 목적으로 만들었는지 어떤 용도로 사용하는지 구분하기 쉽게 설정하는 것이 편하다. 설정 방법은 두 가지가 있다. 계좌의 색을 지정하기 생활비 통장, 급여 통장, 비상금 통장 등으로 이름을 정하기 설정을 하기 위해서는 계좌 이름 옆에 있는 점 세 개 아이콘을 누른다. 색 목록이 나오는데, 원하는 색을 선택하고 을 누르면 계좌의 ...