Ubuntu 22.04 Server / 고정 IP 설정하는 방법
Created 2024-04-13
Last Modified 2024-04-28
설정 파일 수정하기
- 네트워크 설정 파일은 /etc/netplan 디렉토리 안에 있는 yaml 파일이다.
- DHCP로 설치했다면, 설정 파일 내용은 다음과 비슷하게 되어 있다.
# This is the network config written by 'subiquity'
network:
  ethernets:
    eth0:
      dhcp4: true
  version: 2
- 다음과 같이 수정하고 저장한다. IP 등은 네트워크 환경에 맞게 적절히 수정한다.
- via에 있는 IP는 게이트웨이이다.
# This is the network config written by 'subiquity'
network:
  ethernets:
    eth0:
      addresses: [192.168.0.227/24]
      routes:
        - to: default
          via: 192.168.0.1
      nameservers:
        addresses: [8.8.8.8,8.8.4.4]
  version: 2
- 다음과 같이 명령하면 설정 변경 사항이 적용된다.
netplan apply
GUI에서 설정하기
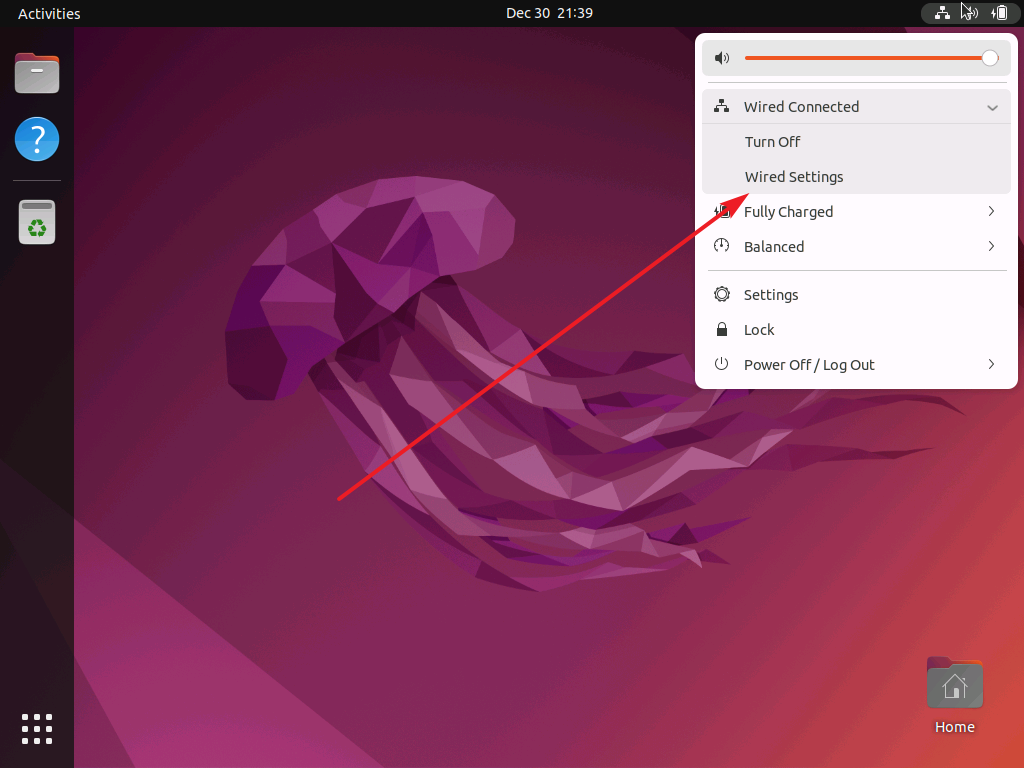
- 오른쪽 위의 네트워크 아이콘을 클릭하고, Wired Connected를 클릭하여 하위 메뉴를 확장하고, Wired Settings를 클릭한다.
- Network에서 설정 아이콘을 클릭한다.
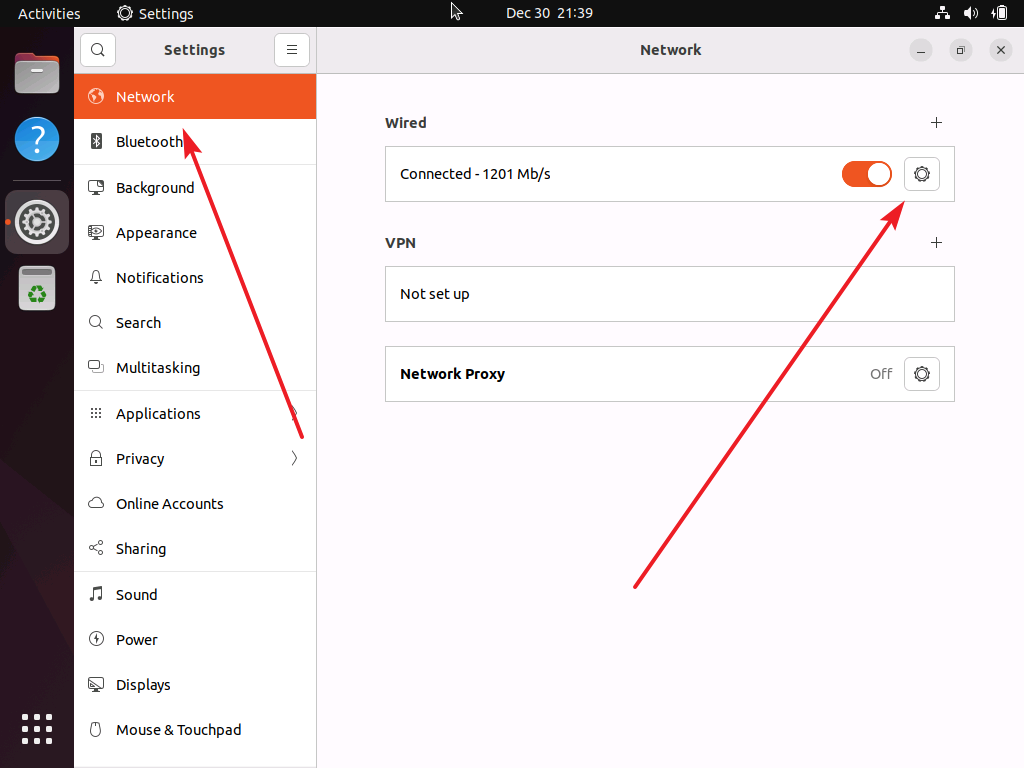
- 적절히 설정하고 Apply를 클릭한다.
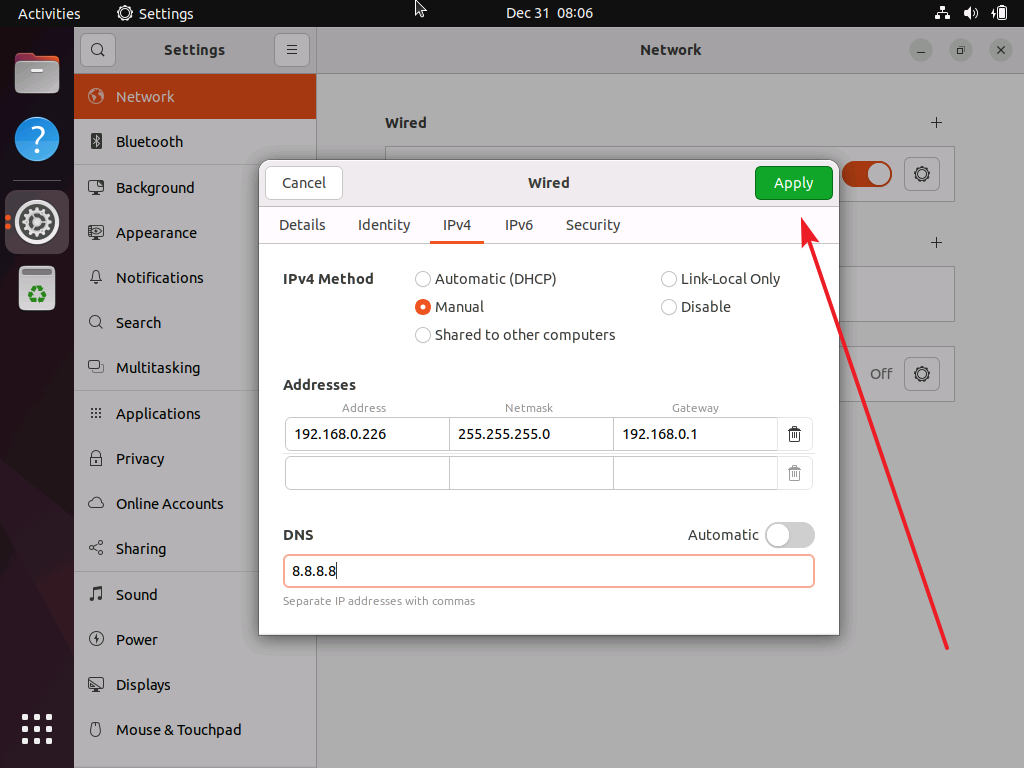
- 토글 버튼을 클릭하여 네트워크를 재시작한다.
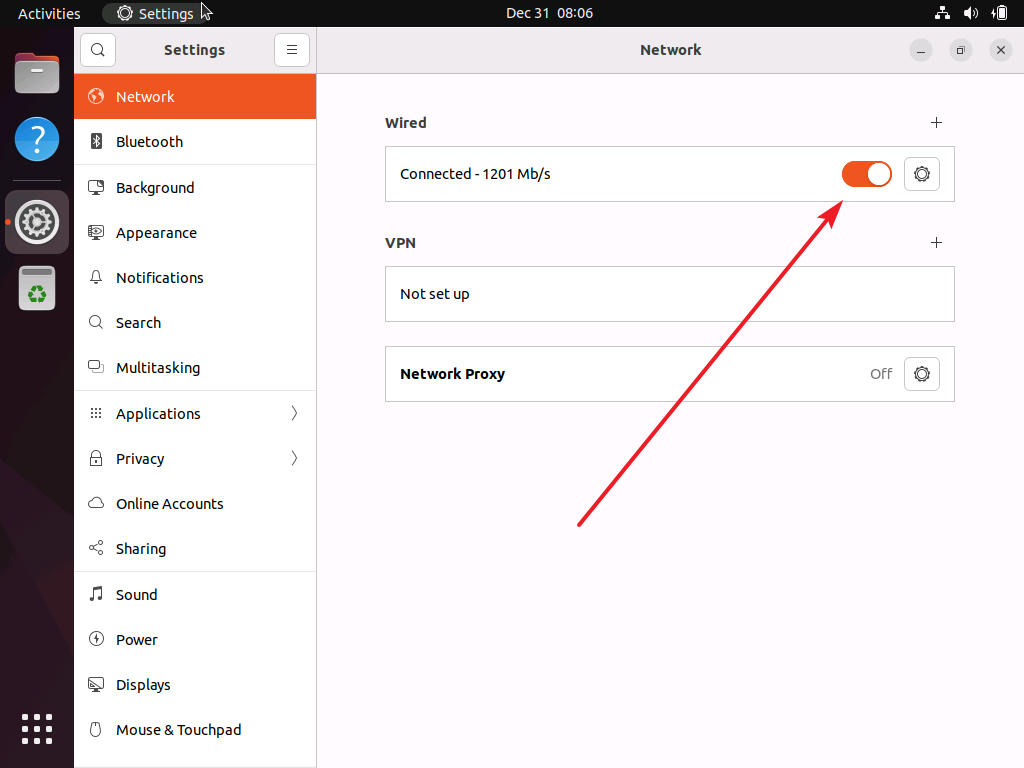
만약 Wired Unmanaged라고 되어 있다면 네트워크 설정을 할 수 없다.
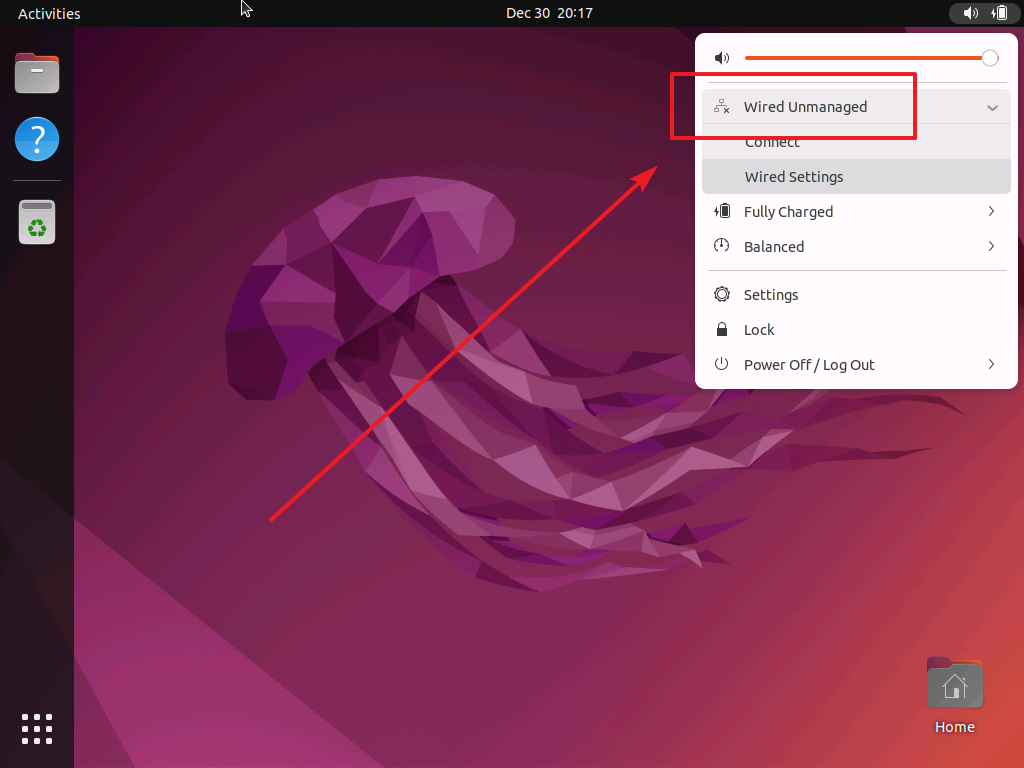
/etc/netplan 디렉토리 안에 있는 yaml 파일에 renderer: NetworkManager를 추가하면 해결된다.
# This is the network config written by 'subiquity'
network:
  ethernets:
    eth0:
      dhcp4: true
  version: 2
  renderer: NetworkManager


