리눅스 / chown, chmod / 파일 또는 디렉토리 소유자, 소유그룹, 권한 설정
chown과 chmod는 파일 및 디렉토리의 권한과 소유자를 관리하는 데 사용되는 Linux 명령어입니다.
정보 확인
- ls 명령어에 -l 옵션을 붙여서 파일 또는 디렉토리의 권한과 소유자(그룹)을 확인할 수 있습니다.
- 제일 앞에 있는 문자는 디렉토리인지 파일인지는 나타냅니다. d는 디렉토리라는 뜻이고, -는 파일이라는 뜻입니다.
- 그 다음 3개의 문자열은 소유자의 권한을, 그 다음 3개의 문자열은 소유그룹의 권한을, 그 다음 3개의 문자열은 소유자(그룹) 이외의 권한을 나타냅니다.
- 처음 나오는 jb는 소유자, 그 다음 나오는 jb는 소유그룹입니다.
# ls -l
drwxrwxr-x 2 jb jb 4096 Feb 16 22:28 test_directory
-rw-rw-r-- 1 jb jb    4 Feb 16 22:34 test_file
chown
chown은 파일 또는 디렉토리의 소유자와 소유그룹을 정하는 명령어입니다.
- test_file의 소유자를 jb, 소유그룹을 hs로 정합니다.
# chown jb:hs test_file
- 소유그룹은 그대로 둔 채 소유자만 jb로 변경합니다.
# chown jb test_file
- 소유자는 그대로 둔 채 소유그룹만 hs로 변경합니다.
# chown :hs test_file
- data라는 디렉토리가 있을 때 다음과 같이 명령하면, data 디렉토리와 그 안에 있는 파일 또는 디렉토리의 소유자를 jb, 소유 그룹을 hs로 만듭니다.
chown -R jb:hs data
chmod
chmod은 파일이나 디렉토리의 접근 권한을 변경하는 명령어입니다.
- r은 읽기(read) 권한, w는 쓰기(write) 권한, x는 실행(excute) 권한입니다.
- 다음을 해석하면, test_file의 소유자는 jb, 소유그룹은 jb이고, 소유자는 읽고 쓰기 가능, 소유그룹은 읽고 쓰기 가능, 나머지는 읽기 가능입니다.
-rw-rw-r-- 1 jb jb 4 Feb 16 22:34 test_file
- r은 4, w는 2, x는 1입니다. 따라서 7은 rwx, 6은 rw-, 5는 r-x, 4는 r--을 뜻합니다.
- 따라서 다음은 소유자, 소유그룹, 다른 사용자 모두에게 읽기, 쓰기, 실행 권한을 주는 것입니다.
chmod 777 test_file
- 다음은 rwxr-x---로 만드는 것입니다.
chmod 750 test_file
- u는 소유자, g는 소유그룹, o는 다른 사용자이고, +는 추가, -는 제거를 뜻합니다.
- 따라서 다음은 소유자에게 실행 권한을 추가하는 것입니다.
chmod u+x test_file
- 다음은 소유그룹에서 쓰기 권한을 제거하는 것입니다.
chmod g-w test_file
- a는 전체를 뜻하므로, 다음은 소유자, 소유그룹, 다른 사용자의 읽기 권한을 제거하는 것입니다.
chmod a-r test_file
- data라는 디렉토리가 있을 때 다음과 같이 명령하면, data 디렉토리와 그 안에 있는 파일 또는 디렉토리의 권한을 777로 만듭니다.
# chmod -R 777 data
SSH 설정 설정 파일 /etc/ssh/sshd_config 포트 변경하기 다음 코드를 #Port 22 다음처럼 바꾼다. Port 1234 포트 번호는 자신이 원하는 것으로... root 계정 로그인 가능하게 만들기 다음 코드를 #PermitRootLogin prohibit-password 다음처럼 만든다. PermitRootLogin yes 설정 변경 적용하기 service ssh restart
리눅스 / 명령어 / rm / 파일 또는 디렉토리 삭제하는 명령어
rm은 remove의 약자로, 파일 또는 디렉토리를 삭제하는 명령어이다. 파일 삭제하기 abc.txt 파일을 삭제한다. 삭제할 건지 다시 묻는다. y 또는 yes를 입력하면 삭제한다. # rm abc.txt 확장자가 txt인 모든 파일을 삭제한다. 각 파일에 대해서 삭제할 건지 묻는다. # rm *.txt 현재 디렉토리에 있는 모든 파일을 삭제한다. 각 파일에 대해서 삭제할 건지 묻고, 디렉토리가 있다면 삭제할 수 없다는 ...
리눅스 / 로그아웃 명령어, 재부팅 명령어, 종료 명령어
로그아웃 명령어 # logout # exit 재부팅 명령어 즉시 재부팅 # reboot # shutdown -r now # init 6 일정 시간 또는 일정 시간 후 재부팅 10분 후 재부팅 # shutdown -r 10 12시에 재부팅 # shutdown -r 12:00 취소 # shutdown -c 종료 명령어 즉시 종료 # poweroff # shutdown -h now # shutdown -P now # halt -p # init 0 일정 시간 또는 일정 시간 후에 종료 10분 후에 종료 # ...
리눅스 / 절전 모드 진입 끄는 방법, 노트북 덮개 닫아도 켜져 있게 하는 방법
노트북에 리눅스를 설치했다. 노트북에 설치했지만 용도는 서버용. 그래서 항상 켜져 있어야 한다. 그런데 노트북의 특성인지 일정 시간이 지나면 절전 모드로 들어가고, 노트북 덮개를 닫으면 잠금(?) 상태가 된다. 그래서 서비스가 중지되거나 원격 연결이 되지 않는데... 항상 켜져 있게 하는 방법은 다음과 같다. 절전 모드 진입하기 않게 하는 방법 다음과 같이 명령하면 절전 모드가 해제된다. # ...
Ubuntu 20.04 Server / GUI 설치하는 방법
Ubuntu Server는 CLI(Command Line Interface) 환경으로 설치된다. 그런데 어떤 작업은 GUI(Graphical Uer Interface) 환경에서 하는 것이 편하다. 만약 GUI 환경이 필요하다면 설치하여 사용할 수 있다. GUI 패키지에는 kubuntu-desktop lubuntu-desktop ubuntu-desktop ubuntu-desktop-minimal xubuntu-desktop 등이 있다. 주로 ubuntu-desktop 또는 ubuntu-desktop-minimal을 사용하는 듯 하다. 예를 들어 ubuntu-desktop-minimal을 설치한다면, 다음과 같이 명령하면 된다. # apt install ubuntu-desktop-minimal Minimal임에도 불구하고 꽤 많은 저장소 공간이 필요하다. After ...

CentOS는 세계 곳곳의 서버에서 다운로드할 수 있습니다. 다운로드하려는 곳에서 가까운 곳에 있고 회선이 좋은 서버에서 다운로드 받아야 빠르게 다운로드 할 수 있습니다. 다행이 CentOS는 가까운 서버를 알려줘서 다운로드에 소요되는 시간을 줄일 수 있습니다. CentOS 공식 다운로드 페이지로 갑니다. 다운로드 하고 싶은 ISO를 클릭합니다. 카이스트, 카카오, 네이버 등 국내 다운로드 주소를 먼저 보여줍니다. 마음에 드는 ...
Ubuntu 18.04 Server / Nginx, PHP, MariaDB 설치하고 설정하기
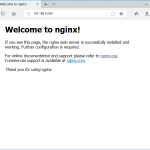
Nginx 설치 Nginx를 설치합니다. # apt install nginx 만약 방화벽을 사용하고 있다면 포트를 열어줍니다. # ufw allow 'Nginx Full' 서버 주소로 접속했을 때 다음과 같이 나오면 제대로 된 것입니다. 시작, 정지 등 Nginx를 시작합니다. # systemctl start nginx Nginx를 멈춥니다. # systemctl stop nginx Nginx를 재시작합니다. # systemctl restart nginx Nginx를 다시 로드합니다. # systemctl reload nginx Nginx를 설치하면 부팅 시 자동으로 시작하게 설정됩니다. 만약 자동 ...
DNF는 CentOS 8에 추가된 패키지 관리 명령어입니다. YUM과 사용법이 비슷합니다. 도움말 보기 dnf -h 패키지 목록 보기 dnf list 그룹 목록 보기 dnf grouplist zip 관련 패키지 검색 dnf search zip zip 패키지 정보 출력 dnf info zip Server with GUI 그룹 정보 출력 dnf groupinfo 'Server with GUI' zip 패키지 설치 dnf install zip zip 패키지 삭제 dnf remove zip httpd와 php 설치 dnf install httpd php Server ...
현재 언어 확인하기 # localectl System Locale: LANG=en_US.UTF-8 VC Keymap: us X11 Layout: us 사용 가능한 언어 확인하기 # localectl list-locales C.utf8 en_AG en_AU en_AU.utf8 en_BW en_BW.utf8 en_CA en_CA.utf8 en_DK en_DK.utf8 en_GB en_GB.iso885915 en_GB.utf8 en_HK en_HK.utf8 en_IE en_IE.utf8 en_IE@euro en_IL en_IN en_NG en_NZ en_NZ.utf8 en_PH en_PH.utf8 en_SC.utf8 en_SG en_SG.utf8 en_US en_US.iso885915 en_US.utf8 en_ZA en_ZA.utf8 en_ZM en_ZW en_ZW.utf8 ko_KR.euckr ko_KR.utf8 언어를 한글로 변경하기 # localectl set-locale LANG=ko_KR.utf8 # localectl System Locale: LANG=ko_KR.utf8 ...
CentOS를 설치하려면 다운로드 받은 ISO 파일을 부팅 가능한 CD 또는 USB로 만들어야 한다. ISO를 부팅 가능한 미디어로 만들어주는 프로그램은 여러 가지가 있는데, 그 중 많이 사용되는 것은 Rufus다. Rufus 다운로드 https://rufus.ie/에서 밑으로 내려가면 다운로드할 수 있는 링크가 있다. Rufus Portable은 설치가 필요 없는 실행 파일이다. 개인적으로 Portable 버전을 선호한다. CentOS 부팅 USB 만들기 Rufus를 실행한다. 다음과 ...